How to Get an OpenAI API Key
Welcome, curious minds! Have you always wanted to develop or test AI tools but as a requirement you needed your own Openai API Key? Today we see how to get your own. Fear not, for you do not need to climb mountains or explore the depths; this mission will be completed from the comfort of your desk.
Step 1: Create an OpenAI Account
Start at the Beginning
To get your API Key you must first create your OpenAI account:
- Navigate to OpenAI’s official website;
- At the top right click “Log In” to create a new account.
Sign-Up
Once you’re on the sign-up page:
- Enter your email address;
- Choose a password as strong as a dragon’s will;
- Solve the captcha to prove your humanity. Robots, begone!

Step 2: Verify Your Email
OpenAI likes to know you’re real (and not a clever bot plotting to take over the world) then it will send you an email to verify it.
- Go to your email inbox;
- Open the verification email sent by OpenAI. If it’s not there, check the mystical land of Spam;
- Click on the verification link.

Step 3: Access the API Dashboard
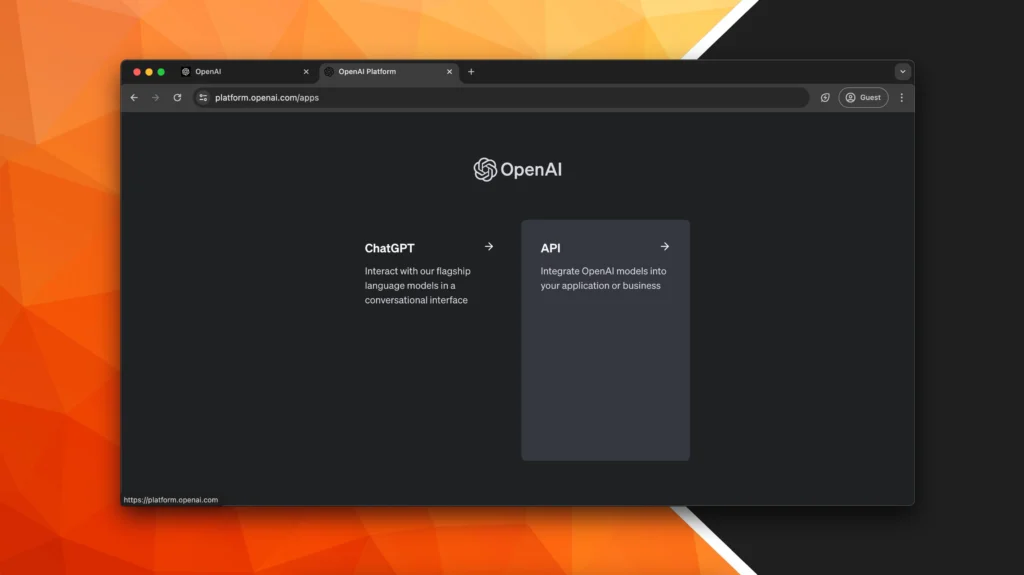
Once your email is verified, it’s time to enter the grand hall of OpenAI. A selection page will open, you can choose to access either your personal ChatGPT or the OpenAI Dashboard:
- Click “API“;

You’ll be directed to your dashboard.

Step 4: Verify your phone number to create an API key
Here’s where things get a tad more serious. Currently, OpenAI requires you to verify your phone number to create an API Key. This is likely due to their commitment to safe and ethical AI use. Here’s what you do:
- Find and click the “API Keys” option in your dashboard, in the left sidebar;
- Hit the ‘Start verification’ button;
- Insert the verification code.

Note: If you have previously created an account and requested the creation of an API Key using your phone number, you will not receive additional free API credits.
Step 5: Create Your New Secret Key
You will encounter a creation form, you will need to enter a name to use to identify your API Key and indicate the project in which to use it. If this is your first API Key you will need to indicate the “Default Project” as the project.
Note: Thanks to the OpenAI organization system, it will be possible to create multiple projects and assign different API Keys to them.
It will also be possible to set a key permission level, these are advanced settings that we don’t need for this tutorial, just leave “ALL” selected. Now you can click on the “Create Secret Key” button and that’s it.

In summary you will have to fill out the form:
- Entering your API Key name;
- Choosing your Project to associate the key;
- Selecting “All” as permission
Step 6: Save your API Key.
Once you create the key, you will need to copy it and save it in a safe place. Be careful NOT to skip this step, as OpenAI explains, this key will no longer be shown to you for security reasons. If you forget to save it you will have to generate a new one.

Step 7: Start Experimenting
Congratulations! You’re the proud owner of an OpenAI API Key: treat your API key like a secret spell. Keep it safe and never share it publicly. Start building amazing projects!
FAQ: The Sage’s Answers to Your Burning Questions
Q: How long does it take to get approved for an OpenAI API key?
A: It can vary. Some might get it within minutes, others might have to wait days. Patience is a virtue here!
Q: Is the OpenAI API key free?
A: OpenAI offers a free tier, but for more extensive usage, you’ll need to swing into the paid plans.
Q: Can I use the API key for multiple projects?
A: Absolutely, but monitor your usage to avoid accidentally summoning a billing dragon.
Q: What kind of projects can I create with the OpenAI API?
A: From chatbots to more complex AI-driven analysis, your imagination is the limit. Just make sure it aligns with OpenAI’s use case policies.
Q: Help! I lost my API key. What do I do?
A: No need to panic! You can regenerate it from the dashboard. Just make sure to update your projects with the new key.
And there you have it — your gateway into the marvelous world of AI. Let the experiments begin, and may your computational quests be fruitful and fun! Happy coding!


0 Comments